VERSO provides an automatic warranty verification feature. This function compares the product and serial number combination entered by a customer when submitting a new MTR with order records uploaded by you to your VERSO database. This upload is accomplished by either manually uploading an excel spreadsheet containing the relevant information or automatically through VERSO’s API service.
Important Notes and Tips:
- You as the subscriber of VERSO are NOT required to use the automatic warranty feature. Automatic warranty is NOT required for a user to create an MTR. The user can create an MTR with no match to an upload record, but the warranty field will reflect N/A, and they will be reminded to enter a product description and product number.
- The upload process is NOT a complete replacement. The following rules apply:
- A new upload file does NOT replace the existing records on the database
- Duplicates WILL be prevented from uploading
- Records must pass the field edits described in the download file (see below), if they don’t pass they will error
- If the subscriber needs to delete a record, they must do it manually through the system.
For the manual upload option, VERSO allows you to use two types of files (XLS and XML), Here is an example of how to create the file:
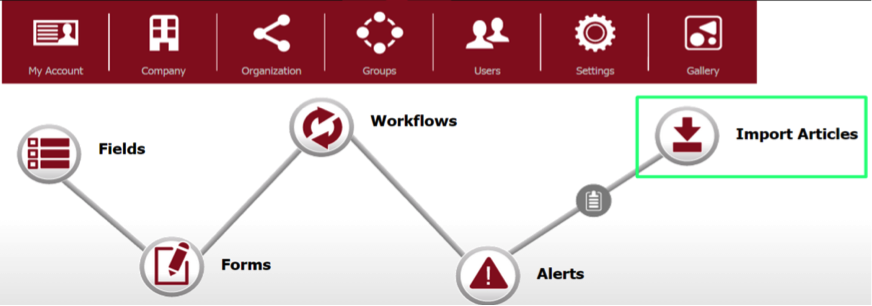
- Log in to VERSO
- Click on Control Panel

- Click on Import Articles
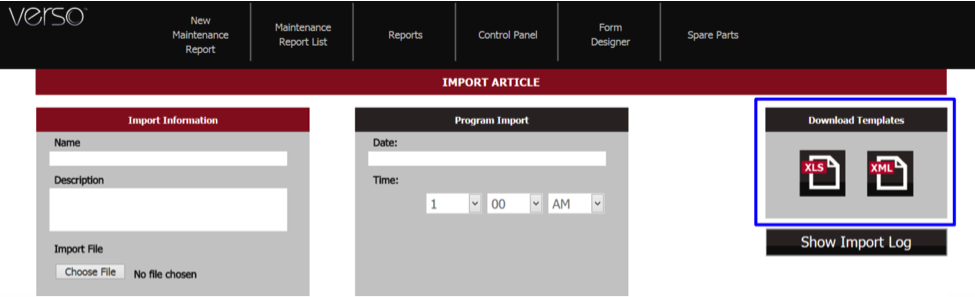
- Click on Import Article

- Here you will see at the top right corner of the screen the template for the excel warranty input file. Click on the Excel option ( XLS ).
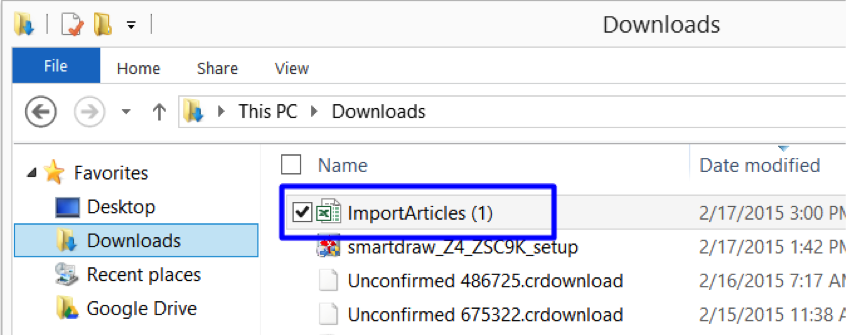
- Go to your download area and search for the file called “ImportArticles” and open it.
- Fill out the document using the file template provided and save the file to your local machine.
 Once your warranty file has been created, you can upload it the system database.
 - Log in to VERSO
- Click on Control Panel

- Click on Import Articles

- Click on Import Article

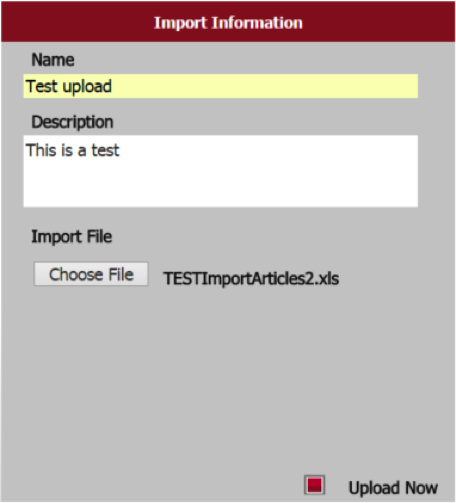
- Fill out all the necessary information, select the file you have created already and click on “Upload Now”
- Click on Submit

If the import is successful, you will see a message stating such. If there are errors you will see a screen with an error message specifying the file row which contained the error, and the corresponding error type. For example this file had an invalid Contract No.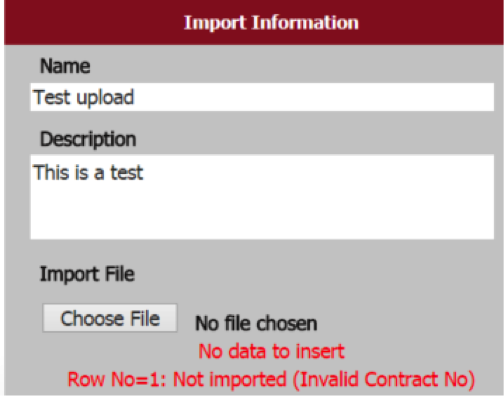
Note: There is also the option to automatically load warranty and order information from your ERP or other third party systems using the VERSO API. API implementation instructions are found in this file: