Installing Excel Add-Ins
The following document will show you how to install the verso add-in for Excel.
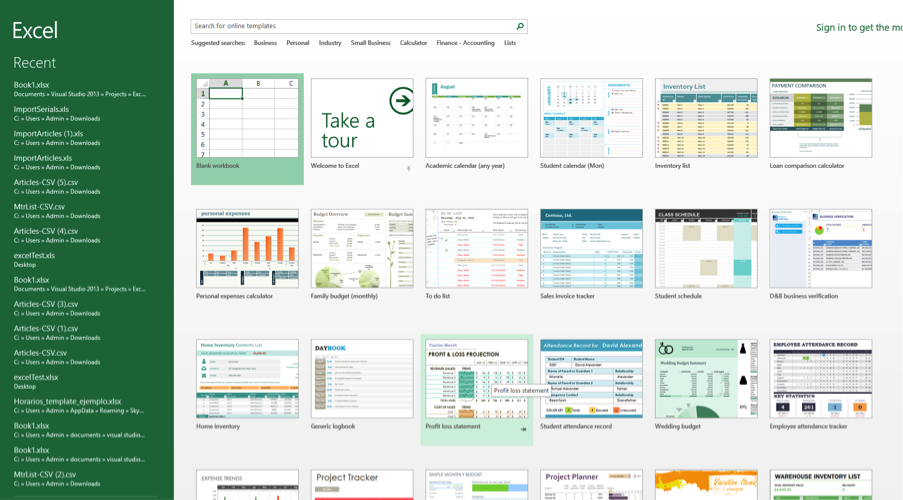
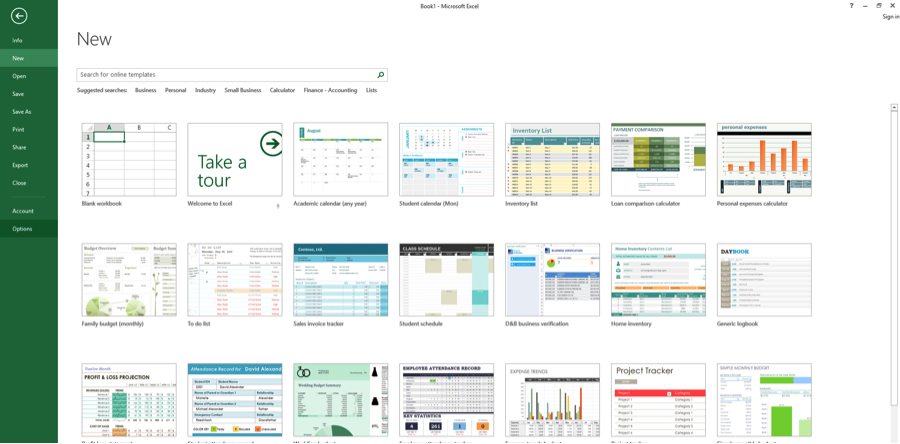
- Open Excel and chose Blank workbook:
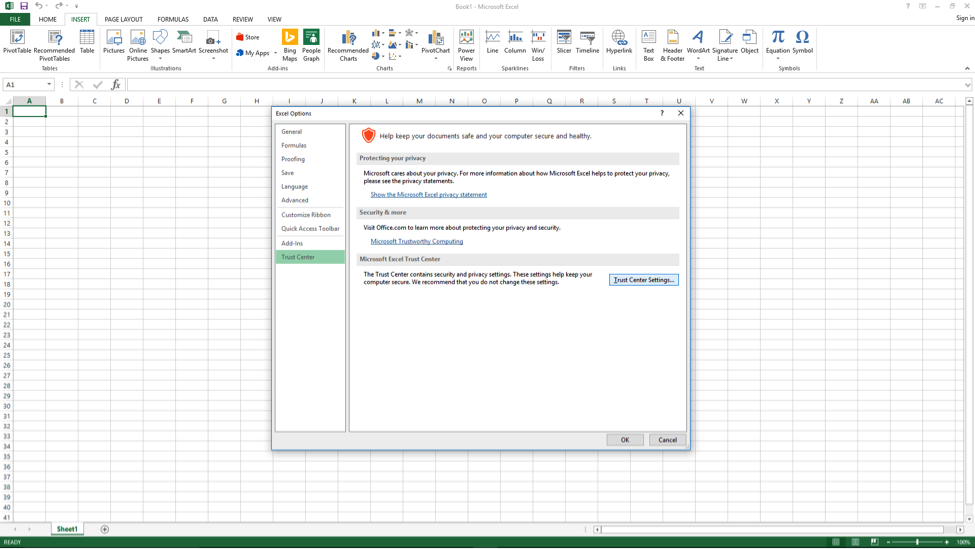
- Choose the File tab, and then choose Options:
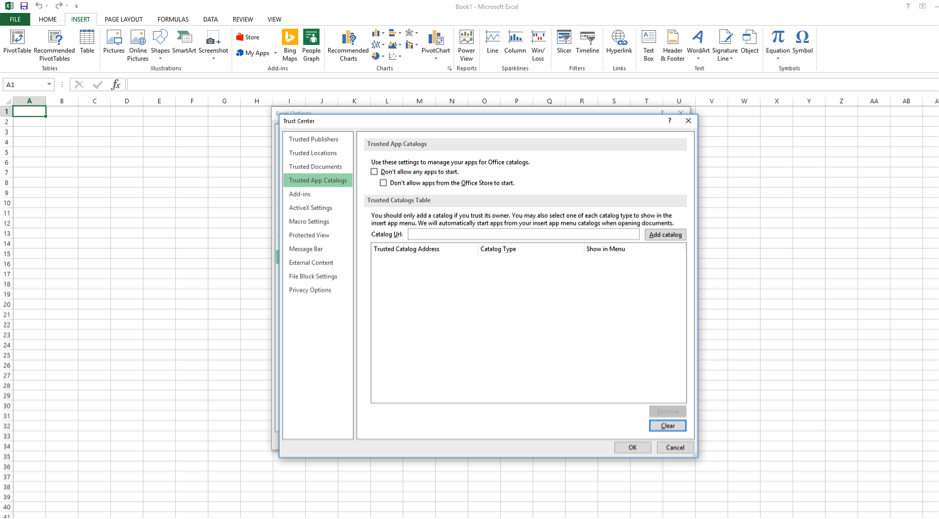
- Choose Trust Center, and then select the Trust Center Setting button:
- Choose Trusted App Catalogs:
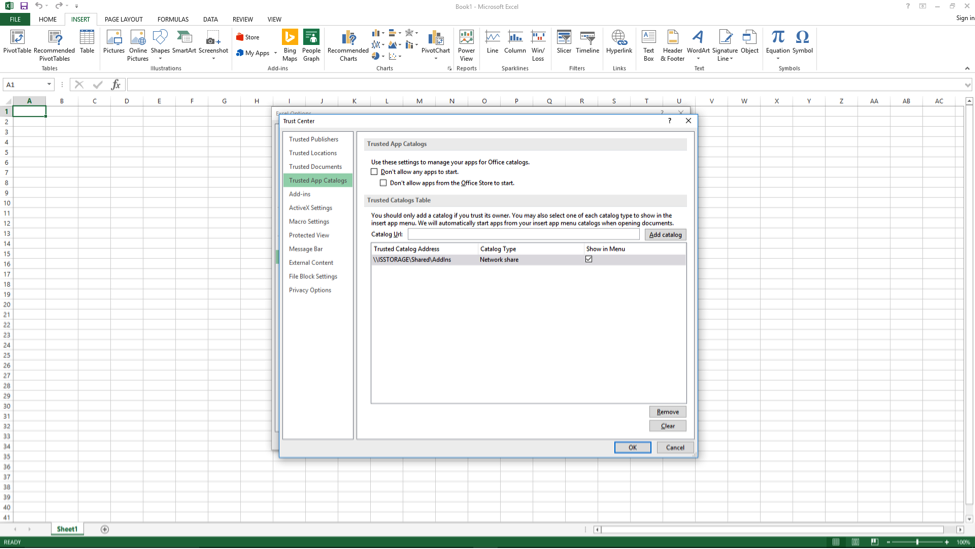
- In the Catalog URL box, enter the path to the network share folder (in this case \\ISSTORAGE\Shared\AddIns), then choose Add Catalog and select the Show in Menu check box, and choose Ok twice.
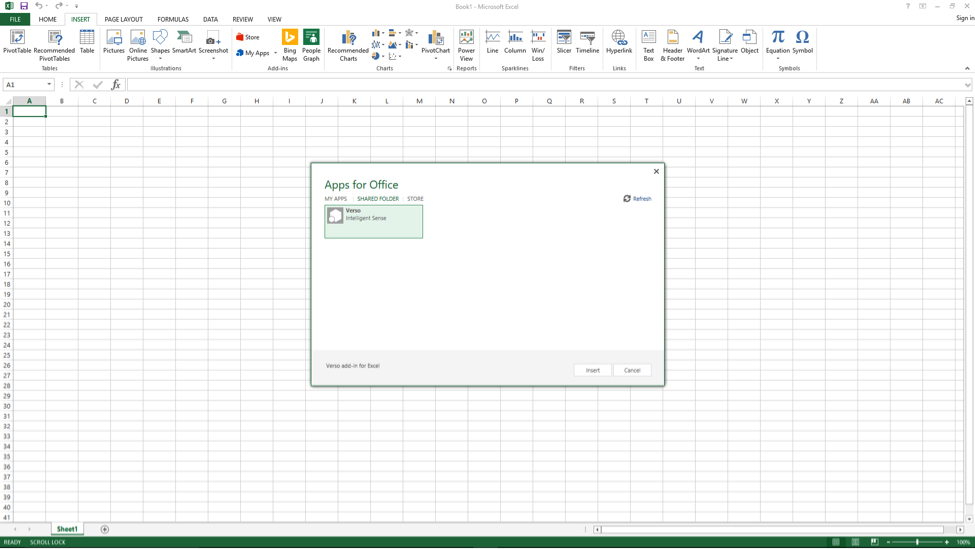
6. Next, select My Apps on the Insert tab:

- Choose Shared Folder and double click on the Verso Add-In
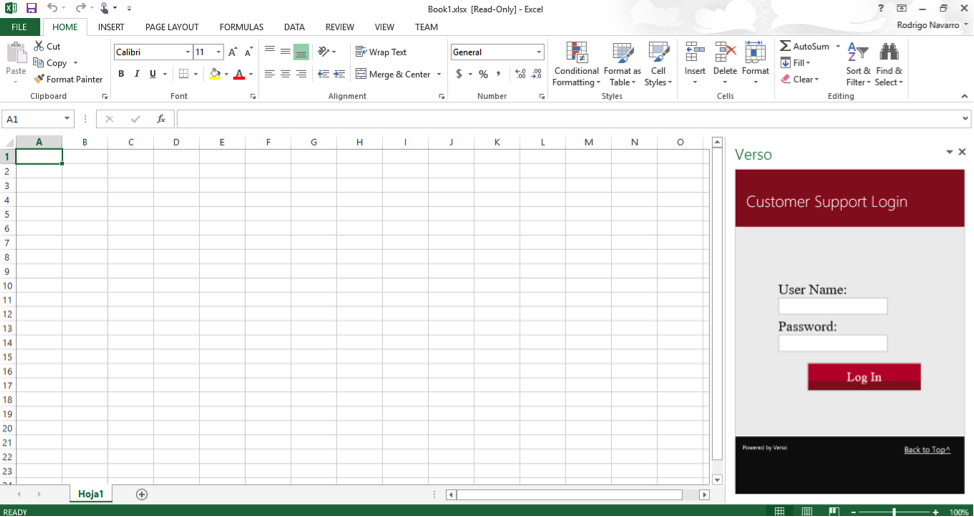
- Enjoy Verso
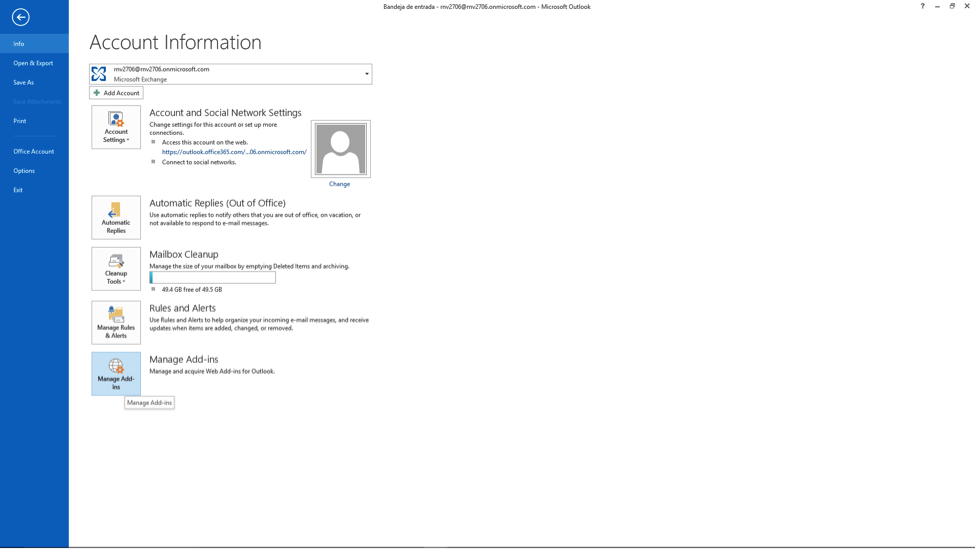
Installing Outlook Add-Ins
The following document will show you how to install the verso add-in for Outlook.
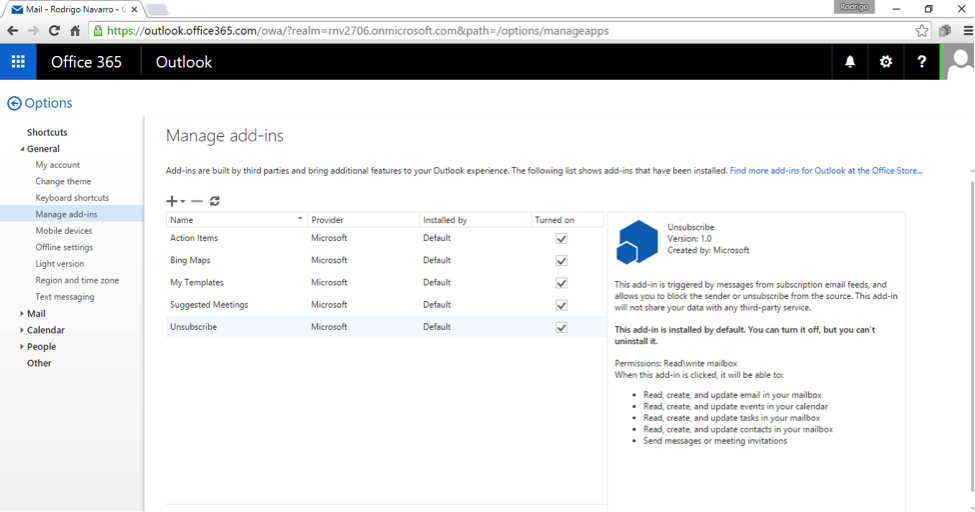
- Open Outlook, go to the File Tab and choose Manage Add-Ins:
- You will be redirected to the web version of Outlook:
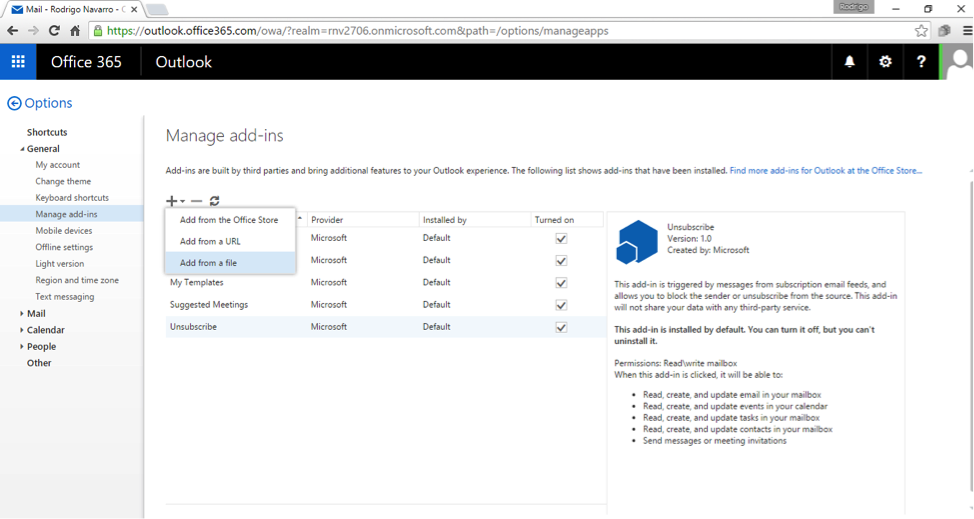
- Choose the plus button (+) to add a new Add-In and choose the ‘Add from file’ option:
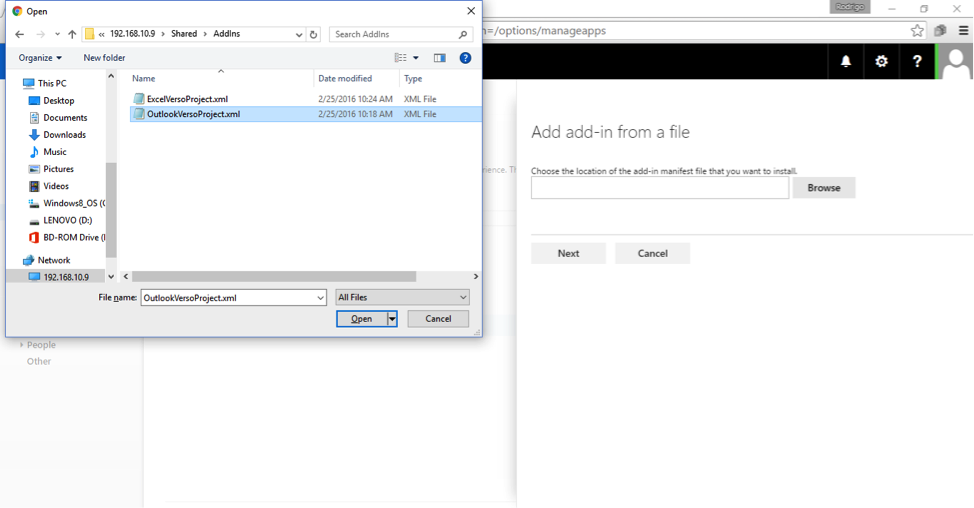
- Browse to the path where the xml file is stored (in this case \\ISSTORAGE\Shared\AddIns), and chose the file ‘OutlookVersoProject.xml’:
- Choose Next and a message requiring confirmation to install the Add-In will appear:
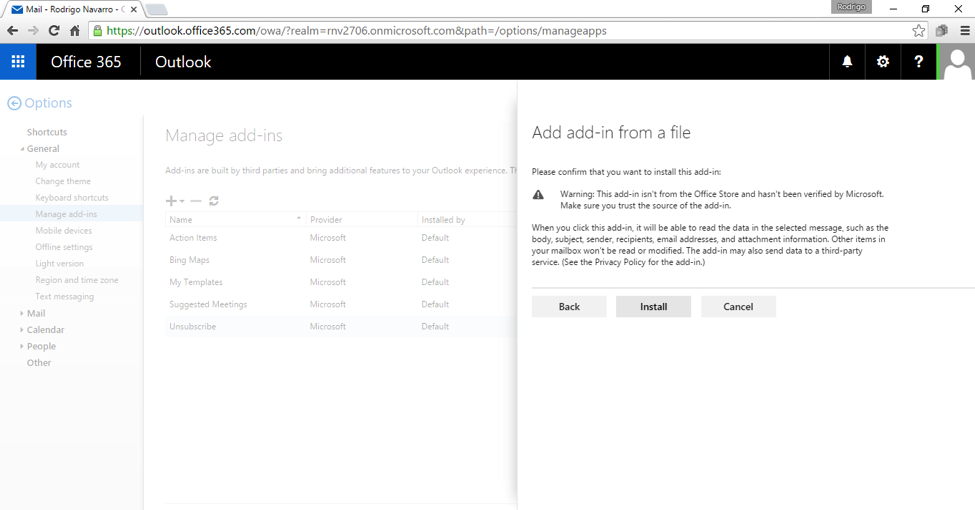
- Click install and then Accept to complete the installation:
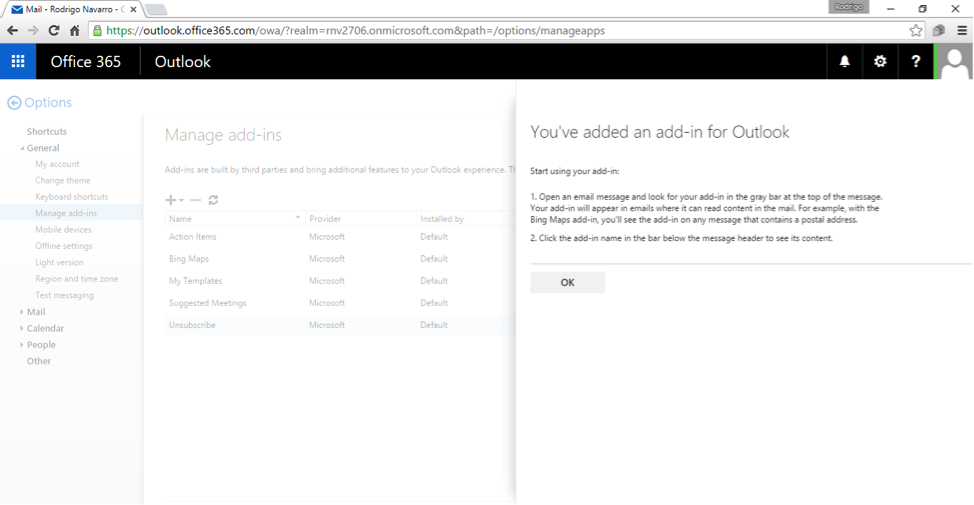
- Enjoy Verso